Quantcast
  • Contact
  • Portfolio
  • Subscribe
  • Recipes
Menu

Set the Table Photography

photography
  • Contact
  • Portfolio
  • Subscribe
  • Recipes
×
Shortcake-with-dark-chocolate-ganache-pistachios-red-sea-salt-Set-the-Table.jpg

Shortbread with Dark Chocolate Ganache, Pistachios + Red Gold Sea Salt

Rachael White December 10, 2013

I'm pretty sure the Victoria's Secret Fashion Show is on TV as I write this. That's right. I'm writing about cookies in my flannel pajamas, without any makeup, my hair piled on top of my head (still not dry from my super fast shower this afternoon during nap time), and my black lab just burped at me from her perch on the sofa. I don't think I need to elaborate on how different my life is from that of a VS model.

Chocolate-Dipped-Shortbread-Set-the-Table.jpg

What I will say is this: I would bet good money that none of them know how to make killer shortbread. At least I've got one up on them.

Seriously though. This shortbread turned out beautifully. It is light and airy with a perfect balance of buttery sweetness and a hint of salt. Many recipes call for cornstarch to help make the texture a little lighter than it would be using only flour, but I decided to take it a step further. Based on what I've learned about potato starch through Asian cooking, I decided to try it out in this shortbread recipe. Typically, I find potato starch has a more delicate, crisp result (very similar to a potato chip texture, actually). Cornstarch can get  a little heavy for my liking and sometimes leaves a sandy feeling in my mouth. I don't want any of that in my shortbread!

Shortbread-Dough-Set-the-Table.jpg
Dark-Chocolate-Set-the-Table.jpg
Pistachios-Dark-Chocolate-Ganache-Set-the-Table.jpg

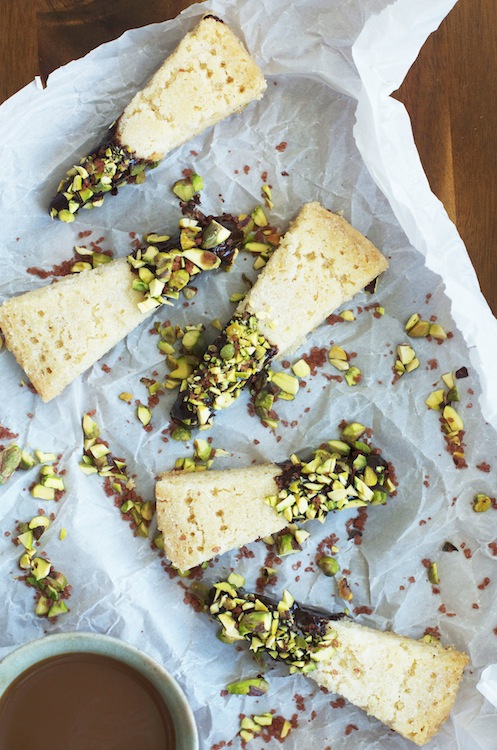
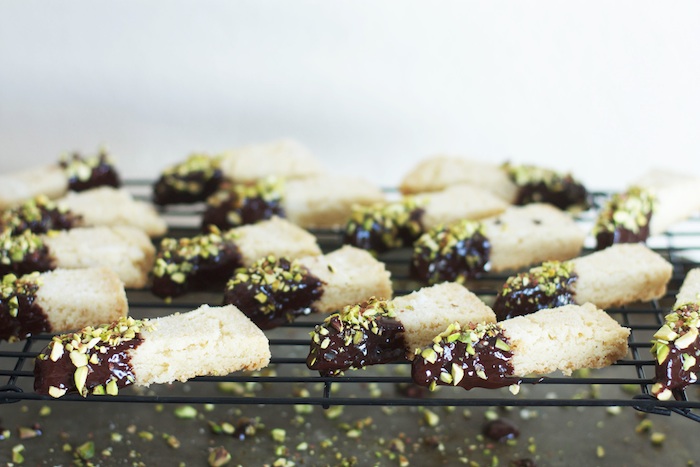
As if shortbread wasn't rich and decadent enough on its own, I decided to dip it in dark chocolate ganache and pistachios. A little sprinkle of red gold Hawaiian sea salt and the cookies were absolutely perfect. This shortbread is festive enough for a Christmas cookie exchange and simple enough to make for a coffee date with friends (although I'd recommend making it the day before). The red gold Hawaiian sea salt is not exactly necessary, but it adds a nice smokey, salty flavor that contrasts nicely with the rich chocolate.

Shortbread-Set-the-Table.jpg

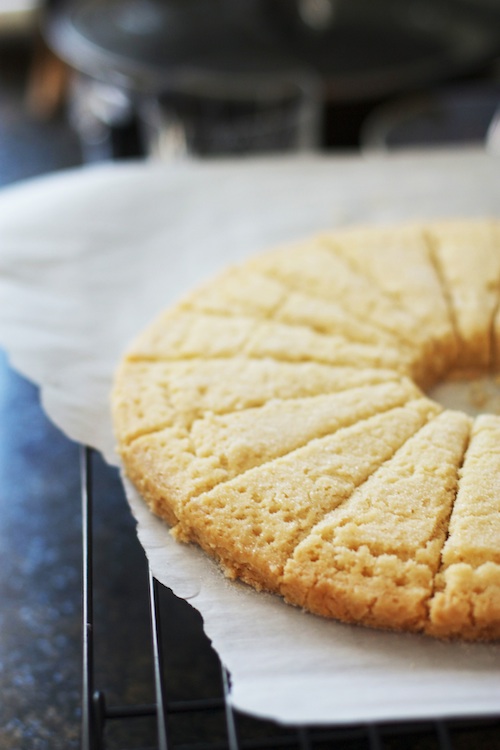
To shape the cookies, I used a method from Cook's Illustrated Baking (if you don't already own that book, you should get on it). If you're not into this shape, feel free to change it up.

Shortbread-Cookies-Dipped-in-Chocolate-Pistachios-Set-the-Table.jpg

If it's all the same to you, I'm going to keep not watching the Victoria's Secret Fashion whatever show and eat another cookie.

Cheers to that!

Shortbread with Dark Chocolate Ganache, Pistachios & Red Gold Sea Salt

Total time: 1 hour 20 minutes

Ingredients

  • 1 3/4 cups all-purpose flour
  • 1/4 cup plus 1 tablespoon potato starch
  • 2/3 cup sugar
  • 1/4 teaspoon salt
  • 2 sticks unsalted butter, cold, cut into 1/4 inch cubes
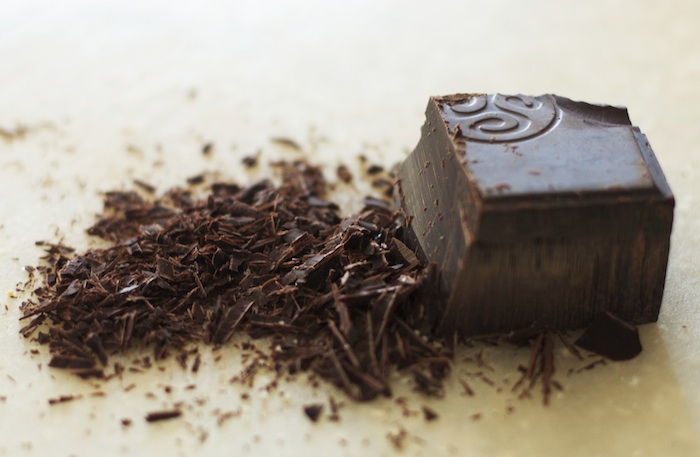
  • 7 oz dark chocolate, finely chopped
  • 3/4 cup heavy cream
  • 2 tablespoons unsalted butter
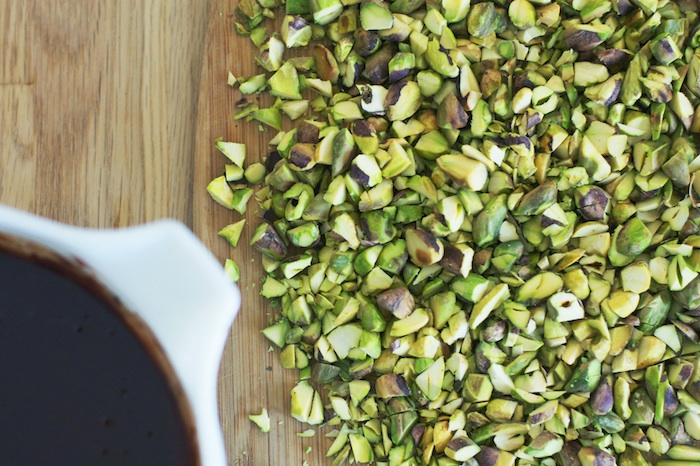
  • 1 cup toasted, chopped pistachios
  • red gold Hawaiian sea salt

Instructions

  1. Preheat the oven to 400 degrees F.
  2. Line a 9 inch cake pan with a circle of parchment paper and set aside.
  3. Line a baking sheet with parchment paper and set aside.
  4. Whisk the flour, potato starch, sugar (reserve 1 tablespoon for sprinkling later) and salt together in a large bowl.
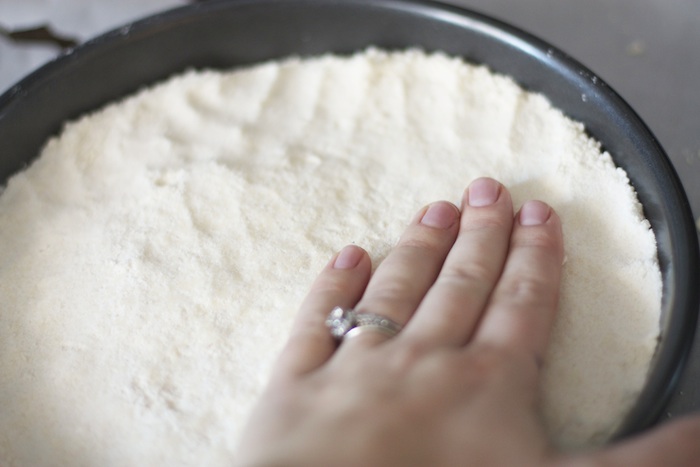
  5. Cut the butter into the dry ingredients using a pastry cutter or two knives. When the mixture resembles wet sand, transfer it to the prepared 9 inch cake pan.
  6. Firmly press the dough into the pan with your fingers.
  7. Gently turn the dough onto the baking sheet lined with parchment.
  8. Place the baking sheet in the oven and reduce the temperature to 300 degrees F.
  9. Bake for 20 minutes.
  10. Remove from the oven and cut a circle in the center of the dough with a metal cookie cutter about 2 or 3 inches in diameter.
  11. Remove the circle of dough from the center and leave the cookie cutter in its place.
  12. Use a wooden skewer to etch lines into the dough creating 16 wedges.
  13. Return the shortbread to the oven for another 40 minutes.
  14. When the shortbread has finished cooking, sprinkle it with the remaining sugar and cut it using the lines you drew earlier as a guide. Transfer to a cooling rack and bring to room temperature.
  15. Meanwhile, make the ganache by heating the cream and butter in a small saucepan over medium heat until it just begins to steam. Remove from the heat.
  16. Stir the chocolate into the cream until it melts completely and the mixture is smooth.
  17. Place a cooling rack over a baking sheet lined with parchment and set aside.
  18. Dip each shortbread wedge first into the ganache, then sprinkle with pistachios and a pinch of the red gold salt.
  19. Place the wedges on the prepared cooling rack and allow the chocolate harden. It won't be like a chocolate shell, but it should be firm enough that it doesn't drip.


Valentine party printables from Smilebox.
In Dessert, Vegetarian Tags christmas cookies, dessert, holiday baking, holiday recipes
6 Comments
Haupia Chocolate Tart | Set the Table

Chocolate + Haupia (Hawaiian Coconut Pudding) Tart

Rachael White November 12, 2013

I love when something forces you to learn. It is easy to get stuck in the usual rotations of life, but sometimes we get an opportunity handed to us that blesses our minds with new information that can reignite our excitement. For me, promoting a luau was just what I needed as a reminder that there is so much food out there that we don't know about.

Over the weekend, I was honored to be part of the United Noodles Second Annual Luau where we served plate lunches filled with kalua pork, mac salad, lomi salmon, and rice. It was so amazing to see how many Hawaiians who now live in Minnesota appreciated eating food that reminded them of home. When we lived in Japan, one of the most comforting things when we were homesick was eating something familiar. It felt good to provide that feeling, but it was also wonderful to see people enjoying Hawaiian food that they didn't necessarily know existed. With Hawaiian music playing in the background and bellies full of delicious Hawaiian food, it was almost enough to forget the chilly Minnesota temperatures outside.

One of my favorite new-to-me recipes is this chocolate and haupia tart. Haupia is a Hawaiian coconut pudding made of coconut milk, shredded coconut, sugar, and cornstarch. It is creamy and the smell will immediately transport you to a beautiful Hawaiian beach. Paired with rich dark chocolate, this dessert is a crowd pleaser for sure.

Chocolate Haupia Tart | Set the Table

The luau was a huge success this year, but if you missed it and would like to learn more so you can be ready for next year (or if you'd like to see me talk about my favorite topic: food!) check out the video by clicking here!

Mahalo to everyone who attended the luau! Hope to see you back again next year!

Chocolate & Haupia Tart

Ingredients

  • 1 store bought chocolate or graham cracker pie crust
  • 8 oz. bittersweet chocolate, finely chopped
  • 4 tablespoons unsalted butter, cut into cubes and softened
  • 1 cup heavy cream
  • 1 shot of espresso (or about 2 tablespoons strong coffee)
  • 1/4 cup sugar
  • 1/4 teaspoon salt
  • 3 egg yolks, beaten
  • 1 can unsweetened coconut milk
  • 1/4 cup sugar
  • pinch of salt
  • 1/4 cup shredded coconut (sweetened or unsweetened are both fine)
  • 3 tablespoons water
  • 3 tablespoons cornstarch

Instructions

  1. Preheat the oven to 250 degrees.
  2. Combine the heavy cream, espresso, sugar and salt in a saucepan over medium heat. Bring to a simmer, stirring to dissolve the sugar and salt. Remove from the heat and set aside.
  3. In a medium bowl, add the chopped chocolate and butter.
  4. Pour the warm cream mixture over the chocolate and stir gently until the chocolate and butter have melted completely.
  5. Add the egg yolks, stirring to fully incorporate them into the chocolate.
  6. Pour the chocolate filling into the pie crust. Place on a sheet pan and bake for 30 minutes. Remove the tart from the oven and let it cool completely before transferring it to the refrigerator for 3 hours before topping with the haupia.
  7. In a small saucepan, combine the coconut milk, sugar, coconut and salt. Stir over medium heat until the sugar has dissolved.
  8. Reduce the heat slightly and add the shredded coconut. Cook for an additional 2-3 minutes. In a small bowl, make a slurry by whisking the water and cornstarch together.
  9. Whisk the slurry into the saucepan with the coconut milk mixture.
  10. Continue cooking and stirring until the liquid thickens, about 3 minutes.
  11. Allow the haupia to cool for about 20 minutes, then pour it over the chocolate tart, spreading it into an even layer.
  12. Return the tart to the refrigerator and chill over night.
  13. Before serving, top the tart with chocolate shavings, toasted coconut, or toasted and chopped macadamia nuts.


In Dessert Tags chocolate, chocolate tart recipe, coconut, dessert, haupia recipe, Hawaiian recipe
1 Comment
Dulce-de-Leche-Sandwich-Cookies-Set-the-Table.jpg

Argentine Alfajores

Rachael White October 22, 2013

In 2005, just after my college graduation ceremony, I frantically began packing my suitcase so that the next morning I could fly to Dallas, Miami, and finally Buenos Aires, Argentina. It's likely that my family, though they have never said as much, thought I was completely insane for leaving so soon after my graduation. The more "normal" step would have been to move out of my off-campus apartment and celebrate with friends and family for a few days before enjoying my last free summer before entering real life with a real job. Instead, I spent the majority of the following day listening to a man talk about his dog, Booger, before finally making it to Argentina where I would spend the next two weeks with Brad.

We would eat good food.

We would dance the tango.

We would get engaged.

Alfajores-Set-the-Table.jpg

That was eight years ago and I still think back to that trip and get butterflies in my stomach. I was introduced to chimichurri, (which I make frequently to this day) and alfajores, which I had honestly forgotten about until a recent trip to an Argentine food truck at the Golden, CO farmers market.

Alfajores-Recipe-Set-the-Table.jpg

Crisp cookies sandwich rich dulce de leche, creating a beautiful contrast of textures that pair perfectly with a hot cup of strong coffee.

Dulce-de-Leche-Cookie-Recipe-Set-the-Table.jpg

When I took my first bite of these cookies, I was transported back to those two weeks in Argentina. It made me ache to return and experience it all again. Until that happens, at least I have this recipe to help me imagine I'm sitting at a café, sipping on café con crema, and looking over at the man I knew, without a doubt, I would spend the rest of my life with.

Alfajores

Ingredients

  • 1 2/3 cups cornstarch
  • 1 1/4 cups flour
  • 1 teaspoon baking powder
  • 2/3 cup sugar
  • 10 tablespoons unsalted butter, softened
  • 1 tablespoon bourbon
  • 1/2 teaspoon lemon zest
  • 4 egg yolks
  • 1 can dulce de leche

Instructions

  1. Preheat oven to 350°.
  2. Whisk the cornstarch, flour, and baking powder together in a medium bowl.
  3. Beat the sugar and butter together in a stand mixer with the paddle attachment until pale and fluffy.
  4. Add cognac and zest and beat to combine.
  5. Add the egg yolks one at a time, fully incorporating each one before adding the next.
  6. Gradually add the dry ingredients and beat until just combined. Do not over mix!
  7. Turn the dough onto a lightly floured surface and gather it into a ball, kneading it gently so the dough comes together.
  8. Form the dough into a log 10 inches long and 1 1/2 inches in diameter.
  9. Wrap the dough in plastic wrap and chill for half an hour.
  10. Unwrap the chilled dough and use a sharp knife to cut it into 1/4 inch rounds.
  11. Place the rounds on two baking sheets lined with parchment paper.
  12. Bake 12-15 minutes until the cookies are a pale golden color.
  13. Transfer the cookies to a cooling rack and allow the cookies to cool completely.
  14. Scoop one teaspoon of dulce de leche onto the bottom of one cookie. Sandwich the dulce de leche with another cookie.
  15. Repeat with the remaining cookies.
In Dessert, Vegetarian Tags alfajores recipe, baking, cookie recipe, dessert, dulce de leche, holiday cookie recipe
8 Comments
Mexican Hot Chocolate Shake :: Set the Table

Mexican Chocolate Shake {Husband Appreciation Post}

Rachael White September 12, 2013

I don't remember the exact conversation Brad and I had before I started my food blog. I'm positive it didn't involve me mentioning that I would be addicted to social media, taking pictures of everything we eat (meaning he couldn't touch it until I was done), or that our pile of dishes in the sink would grow exponentially as a result of this endeavor. No, we did not cover those tiny details. And yet, in the nearly 5 years that I've been blogging, my husband has remained my biggest cheer leader.

Husband Appreciation::the man behind Set the Table

My two favorite boys. Just look at them. How did I get so lucky? So blessed? This was last fall- Riley has grown immensely since then. And I love them both more today than I did when this photo was taken. *Cue heart growing with love, Grinch-style*

Cocoa Powder, Chili Powder & Cinnamon :: Set the Table

Anyway, I, along with a great group of fellow bloggers, have decided to give our partners the credit they deserve. Putting up with all of the craziness that ensues after starting a food blog is worth an award. But a blog post will have to do for now. The lovely Amanda from I Am Baker put this all together. Thanks, Amanda! Now, for a little insight into the man behind the woman behind Set the Table:

  • What is your favorite blog called?

Use Real Butter is pretty awesome and I’ve always loved White on Rice Couple, but Denise from Wasabi Prime has to be the funniest human being on the planet. Or at least a close second to the blogger formerly known as Tokyo Terrace.

  • What is your favorite prop? (this can be dishes or whatever I use in photos that you like)

Rachael’s awesome turquoise-infused cheese board. That thing is amazing. And it usually has cheese on it. Cheese and beauty…can’t beat that.

  • What is the weirdest thing you have seen me do for a blog post?

Remember that scene from Spiderman when he’s hanging upside down and kisses Mary Jane in the rain? Well, sometimes while Rachael is photographing food, she is in some sort of bizarre pose to get the right lighting, These poses are reminiscent of our web-slinging friend. I wish I could somehow slip in there and reenact a scene from the movie…

  • If you could have your own blog what would you call it?

Eat the Table.

  • What do you do for a living and what are your hobbies?

I’m a founding middle school director for a charter school network in Denver, Colorado (http://dsstpublicschools.org/). Rachael and I have one son, but I have 157 children and am in awe at just how much I love my job day in and day out. Golf, cycling, and occasionally singing and playing music are some of my hobbies.

  • How do you cope with the constant photo-taking/social media/blog world craziness?

I love almost everything about the blog world. I get to enjoy all the fruits of Rachael’s food labors, which is like winning the mouth lottery every day. But, I may or may not dream occasionally of a pink iPhone flying out the car window when we’re out and about and I want my wife back for a few minutes.

  • Who does the dishes?

Ouch. I used to. Really, I did. But the sheer amount of dishes these days has made it a two-person job, with Rachael being both of those people.

In all fairness (this is Rachael speaking again, by the way) Brad did do a lot of dishes. But as he said, he has 157 children and a son of his own. His life is incredibly busy and he is doing amazing things out there in the land of education. If that means I have to do a few more dishes, that's fine with me. I do make sure he changes diapers on a regular basis though.

Mexican Chocolate Milk Shake :: Set the Table

To say thank you for all the support he's given me over the years, I've made this Mexican chocolate shake for Brad. He goes completely crazy over the combination of chocolate and cinnamon in hot chocolate, so I've made it a little more decadent (and chilly) by putting those flavors into a milkshake. There isn't any chocolate syrup used here. Just straight up cocoa powder for the best, richest chocolate flavor. Plus, the powder keeps the shake from tipping the sugary scale. I've also added cinnamon, nutmeg and just a little chile powder for some smokey heat. It's a lovely treat and the perfect way to rope your husband into doing dishes say thank you for everything.

Thank you, my love, for always being there to push me to do better. And to eat my food. I love you.

To find out more about other blogger partners, check out this list (some delicious recipes in these posts as well!):

Lauren from Keep It Sweet Desserts madeM&M Kit Kat Cake

Rachel from Rachel Cooks madeWhole Wheat Chocolate Chip Cookies

Shanna fromPineapple & Coconut made Best Ever Chicken Enchiladas

Meaghan from The Decorated Cookie made Homemade SpaghettiOs

Amy from Very Culinary shared a Fabulous Video!

Liz from The Lemon Bowl made Lebanese Meat Pies (Sfeehas)

Cassie from Bake Your Day made Something Fabulous

Erin from The Law Students Wife made Chicken Stir Fry with Thai Peanut Sauce

Heather from Sugar Dish Me made Bourbon Apple Shortcakes

Dorothy from Crazy For Crust made Pretzel Toffee Peanut Butter Cookies

Lauren from Climbing Grier Mountain shared At the Table with Mr. B

Tanya from Lemons for Lulu made Something Fabulous

Erin from Texanerin Baking made Healthier New York Times Chocolate Chip Cookies

Jen from Jens Favorite Cookies made Chocolate Pudding

Jamie from Thrifty Veggie Mama made Something Fabulous

Diane from Created By Diane made Rocky Road Cookie

Nikki from Seeded at the Table made Oatmeal Cream Pie Ice Cream Sandwiches

Meagan fron A Zesty Bite made Something Fabulous

Taylor from Greens & Chocolate made Something Fabulous

Amanda from i am baker made Classic Cheesecake with Double Crust

Kristy from Sweet Treats & More made Something Fabulous

Lauren from Healthy. Delicious. made Something Fabulous

Erin from Dinners, Dishes, and Desserts shared a Round up of Hubbies Favorites

Julie from Julie's Eats and Treats made Something Fabulous

Stefani from Cupcake Project made Graham Cracker Waffle Cones

Katerina from Diethood made Something Fabulous

Betsy from Java Cupcake made Something Fabulous

Kimberly from The Daring Gourmet made French Almond Cake

Mexican Chocolate Shake

Ingredients

  • 2 tablespoons unsweetened cocoa powder
  • 1/2 teaspoon cinnamon
  • 1/4-1/2 teaspoon chile powder, depending on how much heat you want
  • pinch of ground nutmeg
  • 1 cup vanilla ice cream(about 3 small/moderate scoops)
  • 1/2 cup milk
  • 1/3 cup whipping cream

Instructions

  1. Combine the cocoa powder, cinnamon, chile powder and nutmeg in a small bowl. Set aside.
  2. Whip the cream until stiff peaks form. Do not sweeten. Set aside.
  3. Add the cocoa powder mix to a blender with the ice cream and milk. Blend until smooth. Pour the shake into a tall glass and top with a dollop of freshly whipped cream. Sprinkle with additional cinnamon if desired.
  4. Serve immediately.
In Dessert Tags chocolate, chocolate shake, cinnamon, dessert, ice cream, ice cream shake recipe, mexican chocolate, mexican chocolate milk shake recipe, Mexican hot chocolate, milk shake recipe, recipe, sweets
53 Comments
Cream-Cheese-Ice-Cream-Sandwiches-Set-the-Table.jpg

Cream Cheese Ice Cream Sandwiches

Rachael White August 6, 2013

I'm enjoying my last few days in Minnesota. My parents and sister have been spoiling me by helping out with Riley so I can spend some time on my own. What a gift. I feel like I'll be returning to Denver feeling refreshed and ready to get back to the day-to-day business of being a stay-at-home mom, blogger and wife. It may have taken nearly 3 weeks, but vacation mode finally set in and allowed me to relax.

Cream-Cheese-Ice-Cream-Sandwiches-Set-the-Table1.jpg

During my first week in Minnesota, my mom and I went to Stillwater. We enjoyed lunch outside on a sunny rooftop patio, walked around and browsed shops, and treated ourselves to a delicious ice cream sandwich. (Ice cream sandwiches conjure memories of elementary school softball games on hot August nights and anticipation of summer's end and a new school year.) The café that made the ice cream sandwiches had a DIY approach, so you could pick any ice cream and any cookie combination. We went with cream cheese ice cream sandwiched between snickerdoodle cookies. After the first bite, I knew I had to recreate the creamy, slightly tangy ice cream.

Cream-Cheese-Ice-Cream-Set-the-Table2.jpg

I followed through on my vow to recreate the ice cream (and of course added my own twist to it) during Riley's nap time the other day. And in the spirit of full disclosure, I used store-bought cookies rather than making my own. I'm on vacation, people!

Messy-Ice-Cream-Sandwich-Set-the-Table.jpg

My cream cheese ice cream is luxurious, with a slight tang similar to cheesecake and some warmth from a little cinnamon. The cookies were good, but next time I would make my own so I could have more control over the thickness and overall size. These, as you can see in the photo above, were very large and didn't showcase the ice cream the way I wanted. The good news? We have more ice cream. And 3 more days of vacation. So I can experiment with other combinations.

Homemade (mostly) ice cream sandwiches are the perfect way to celebrate these last sweet days of summer.   What ice cream/cookie combination would you like to try?

Cream Cheese Ice Cream Sandwiches

Ingredients

  • 2 eggs, lightly beaten
  • 1 cup heavy cream
  • 1 cup whole milk
  • 11 oz cream cheese, softened
  • 3/4 cup sugar
  • 1 tablespoon ground cinnamon
  • 1 tablespoon vanilla extract

Instructions

  1. In a large saucepan, heat the heavy cream and whole milk until steam begins to rise and small bubbles form around the edges (approximately 175 degrees F). Combine the sugar and cinnamon in a small bowl. Add it to the saucepan and stir until dissolved. Take a small amount (about 1/2 cup) of the hot liquid and whisk it into the eggs. Add the egg mixture to the pan, lower the heat and stir constantly for a minute or two.
  2. Over low heat, cook the milk and egg mixture until it reaches about 160 degrees F. It should coat the back of a spoon. Transfer the mixture to a bowl and chill it in the refrigerator for 4-6 hours (you can speed up the process by first placing it in the freezer for about 30 minutes then moving it to the fridge).
  3. Pour the mixture into your ice cream maker and freeze according to the manufacturer's instructions. Transfer the ice cream to a freezer-safe container, cover and freeze for at least 2 hours before serving.
  4. Place two cookies upside down on a work surface. Place one scoop of slightly softened ice cream in the center of one cookie. Top with the second cookie and press carefully until you have an easy to handle sandwich. Smooth the edges with an offset spatula or butter knife if you wish. Return to the freezer for half an hour before serving.
In Dessert, Vegetarian Tags cream cheese ice cream, dairy, dessert, homemade ice cream recipe, summer
6 Comments
← Newer

Search Posts


Featured Posts

Summary Block
This is example content. Double-click here and select a page to feature its content. Learn more
Featured
Sep 22, 2025
Cursus Amet
Sep 22, 2025
Sep 22, 2025
Sep 15, 2025
Pellentesque Risus Ridiculus
Sep 15, 2025
Sep 15, 2025
Sep 8, 2025
Porta
Sep 8, 2025
Sep 8, 2025
Sep 1, 2025
Etiam Ultricies
Sep 1, 2025
Sep 1, 2025
Aug 25, 2025
Vulputate Commodo Ligula
Aug 25, 2025
Aug 25, 2025
Aug 18, 2025
Elit Condimentum
Aug 18, 2025
Aug 18, 2025
Aug 11, 2025
Aenean eu leo Quam
Aug 11, 2025
Aug 11, 2025
Aug 4, 2025
Cursus Amet
Aug 4, 2025
Aug 4, 2025
Jul 28, 2025
Pellentesque Risus Ridiculus
Jul 28, 2025
Jul 28, 2025
Jul 21, 2025
Porta
Jul 21, 2025
Jul 21, 2025

Powered by Squarespace